Binder, Interactive Notebook, Digital Notebook Oh My!

In last week’s episode, episode 59 where I talked about streamlining your content in order to have the time to actually put relationships first, the main recommendation was to put your content delivery into video. There are many reasons why, and if you haven’t yet, be sure to go back and listen to those suggestions, but this week’s episode on creating one space for your students is in the same vein as streamlining your content.
Are we going to talk about Binders, Interactive Notebooks, and Digital Notebooks, oh my? You betcha.
But this episode is more about streamlining your classroom, especially the aspects of it that are student facing, so you can use more of your time focusing on what matters - connecting with your students.
So what we’re going to streamline today is what, rather where, exactly our students house all of their materials and necessities for our class, and go over the purposes of this one spot for your students.
As chaotic as things have felt in the recent years, it’s very clear that having so many places and so many spots for turning in work, housing work, or just keeping items for reference is a stressor for kiddos, but also for us as their teachers, especially when it comes to grading that work.
In this episode we’ll talk about declaring one spot for your students and what that one spot could be because having ONE spot to go to is better than many when it comes to managing your students' work in a virtual or in-person classroom.
After listening to this episode you’ll feel empowered to simplify what we call the student experience of your classroom by creating one central spot for your students so that it can create a more sustainable work flow for them and for you.
Let’s get to it.
When living through a pandemic that is steeped in change and uncertainty, our classrooms can serve as a place of constancy for our students. It can do so if and only if there is a predictable flow to what they do and if they know where to go to access what they need for your class and even your classroom as a whole when it’s outside the four walls of your physical classroom.
If teaching through a pandemic has taught us anything it’s that, simultaneously, a classroom can span outside its four walls, but is more effective inside them.
But that’s an issue bigger than us, so let’s focus on what we can control, making our classroom (whether in person, online, or hybrid) a constant presence for our students, and being ready for any of those scenarios as the walls of our classroom become more and more transient. That’s a win-win for us, right?
What’s the point of one spot for students?
By minimizing where they do things as much as possible. Although there are fantastic tools out there (and I’m not saying don’t use them) that offer a wide variety of benefits to all aspects of learning, there are ways to use them that help students see them as part of your course and are easy to get to so they can focus on their learning rather than the stress of the structure and getting where they need to be.
It’s just more sustainable that way.

Knowing what to teach, and using as few tools as possible in incredibly effective ways so as to get kids to mastery.
Reducing all the places of your classroom, which could be all the tools, resources, assignments, etc. to just ONE spot automatically gives your students a sense of familiarity rather than the stress of learning something new (before they even get to the content).
But it also gives you one spot to see their learning process in action, meaning you can more effectively hold them accountable for doing the work of and learning within your class.
What about all the tech?
Now, it’s important to address the fact that it feels like just about every aspect of learning is moving to the digital space. So, it would seem irrelevant or misleading of me to spend any time in this episode talking about physically existing spaces like a binder or paper notebook, right?
Well, not quite, and here’s why.
If this idea of streamlining student content is new to you, jumping in headfirst straight to fully digital (meaning a digital interactive notebook) may set you up for failure. I know it would have done so for me.
And, although much of the classroom and process of learning is able to move to the digital space, the act of writing down what one is learning is still backed by research as a necessary and more effective way for the brain to encode, rehearse, and then better retrieve information. Be sure to head to our full length show notes linked below to read an article from Psychology Today on the two reasons why handwritten notes are better.
So once you’ve listened to this episode, maybe you start with the one spot, and it’s a binder or notebook, but then down the road hop on the digital notebook train. Or, maybe, you’re ready to get the full benefits of one digital space for your students given the tips I provide in this episode, and you want to jump in with two feet. That’s your autonomy, teacher-friend. Own it.
A Student Binder
I love a good binder. There are tons of benefits to using a binder for your students to house all their materials for your course. All papers can be easily rearranged or added to because of those three rings. And the covers are pretty darn durable, even with how banged up they get.
This binder could house all of your students notes and class activities, as well as the reflection work, which we’re going to talk about in a future episode, and anything else that’s a routine in your classroom. But I want to provide some tips after I discuss the interactive notebook as well.
The binder was the predominant structure I used in my classes because I taught content heavy courses with a cumulative test at the end of the year. So I wanted those binders to house all of my students' notes and class activities that weren’t digital, and I wanted them to last all year.
This structure allowed the notes and activities to be living documents of sorts that students didn’t just do and move on from. Instead they revisited them. They used them to construct and reconstruct their understanding, and to build off of, and, finally, to revisit when it was time to refresh and prepare for assessments.
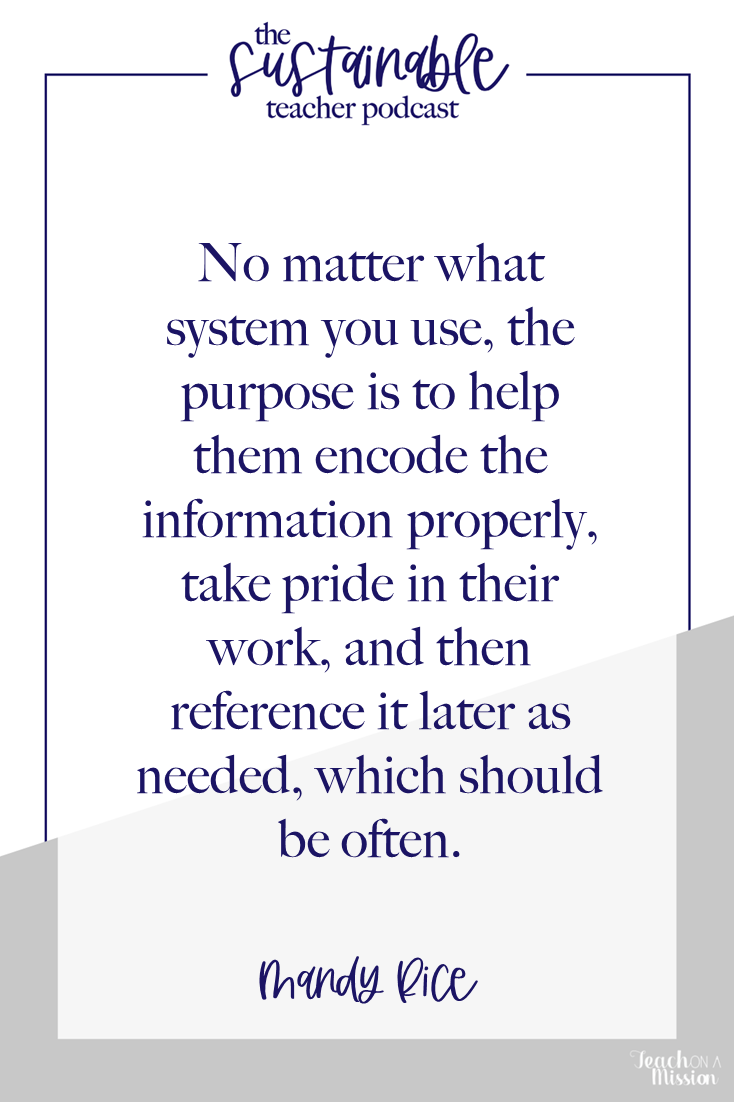
My students' binders were very much their best friends of my course. Which, I loved the idea of that WAY more than a textbook being their best friend. This was content my students were constructing, with guidance of course. They could get creative, they could highlight, color, use sticky notes, anything they needed to do to help them encode the information properly, take pride in their work, and then reference later as needed, which was often.
In some of my classes, I provided space for students to leave their binders in the room, especially if it was a class where we frequently did not have work to take home. And students used dividers per unit. This structure is up to you, but I wanted students to metacognitively understand the structure and order of the class, helping their overall understanding, and structuring their binder as such was helpful.
When it came time to hold students accountable for their work in class, which was just about everyday, it was so easy to check their binders and have authentic conversations with students about their learning, whether that was a hard conversation of being honest with them and motivating them, or a positive conversation encouraging their hard work thus far.
These conversations were EVERYTHING to my classroom and students’ success. I can’t ever overstate how impactful it was to have daily conversations with my students, and this binder structure, which I thoroughly teach and provide templates for inside of Flipped Classroom Formula, was the biggest factor in making it possible.
Interactive Notebook
The next option is an interactive notebook. Which is simply a spiral bound or otherwise bound stack of notebook paper where you provide students with any amount of activities, whether guided on the board or an a handout, and students put those activities in their notebook and interact with them, hence the name.
It’s very similar in benefits and purpose to the binder, but it steps up the game of monitoring and teaching organization to your students. In fact, in one of the classes where I used these notebooks, complete with tabs and scissors and glue at each table, many students said it was the most organized they had ever been. So, if walking the walk in organization is not that important to you, then this option is not for you - meaning the other options are much more time effective.
However, I highly encourage you to go search this term on Pinterest. The amount of creativity that is invested in this one area is astounding, and quite addicting to be honest. Which is a good thing, because that means that other teachers have created activities for you to include in your interactive notebook.
The biggest benefit I see to the interactive notebook is that is ups the game in ownership for students. They will spend time and effort creating this thing, and then more time and effort on the content within the covers of this notebook, and so they will feel more ownership of their learning. It also provides more blank space, less scaffolded or structured space, for students to express their creativity within the content, which could be a huge benefit within your content area or grade level.
When it comes to holding students accountable for their learning within this one, streamlined place where they create and record their learning, it’s much like the binder system I described earlier. It allows time each day for me to have authentic and impactful conversations with individual students about their learning and how things are going for them. What their one spot looks like may be different, but in this case it serves the same purpose.
Digital Interactive Notebook
The last of the three options I have for you is the full monty, the big game, the mack daddy of “one-spots” for your students. It is the digital interactive notebook.
I’ll be real honest. When digital interactive notebooks first went big I totally geeked out with all the creativity and possibilities, but I quickly got overwhelmed by it all and made the decision that the overwhelm just wasn’t worth the reward.
But then I thought, what if I can offer teachers a chance to skip the overwhelm and still reap the reward? Welp, that’s totally my intention here.
Here’s the thing. The teachers who have been through any of my programs, for the most part, know about the binder system I use (shout out to my amazing Sustainable Psych & Biology Teacher members and my Flipped Classroom Formula teachers - miss you guys).
Well, as soon as things went virtual, that binder system was pretty much shot. Most systems were shot when everything went virtual, right?!? 😭
Enter the digital notebook. Some call it the digital interactive notebook, which really is a better name because there are great (and easy) ways to make activities students can interact with without it taking forever or bogging down your workflow.
It’s no new concept, but for many of us, we may be used to the traditional interactive notebook and not understand how it can go digital. Well, not only can it go digital but it can be a great place for students to house all of their work in a way that truly assists them in their understanding, all while being accessible outside the four walls of your room.
There are entire facebook groups dedicated to the digital interactive notebook that I would encourage you to check out, but, if you’re anything like me, you might be overwhelmed by the idea of creating one from scratch, and by all the ways it can be implemented.
In this post, I’d like to explain how it can serve your classroom and then offer you a free template so you don’t have to create one from scratch. You just make it work for your course.

Keep it simple
I’m going to do a couple things here - I’m going to both describe the template for you and aspects of a digital interactive notebook so you can fully understand the benefits and know if it’s a good fit for you.
And we’ll start by keeping it simple. That is, my biggest recommendation for you is to keep the DINB and your understanding of super simple.
First, a DINB is just a Google Slides or Powerpoint file. That’s it. It’s not some new fancy tool you have to learn. What’s great is that you can keep it incredibly simple or you can learn all kinds of great new skills inside of Slides or Powerpoint and make it more aesthetically appealing and more navigable much like a traditional notebook… it’s totally up to you.
Once you make the digital interactive notebook how you want it to be both in looks and in its structure, you just assign it on Google Classroom or in Teams.
I’ve got tons of awesome pictures showing off a DINB and the free template I have for you on our website where you’ll find our full length show notes and how to grab that free template. It’s linked below where you’re listening, so go check that out when you’re ready.
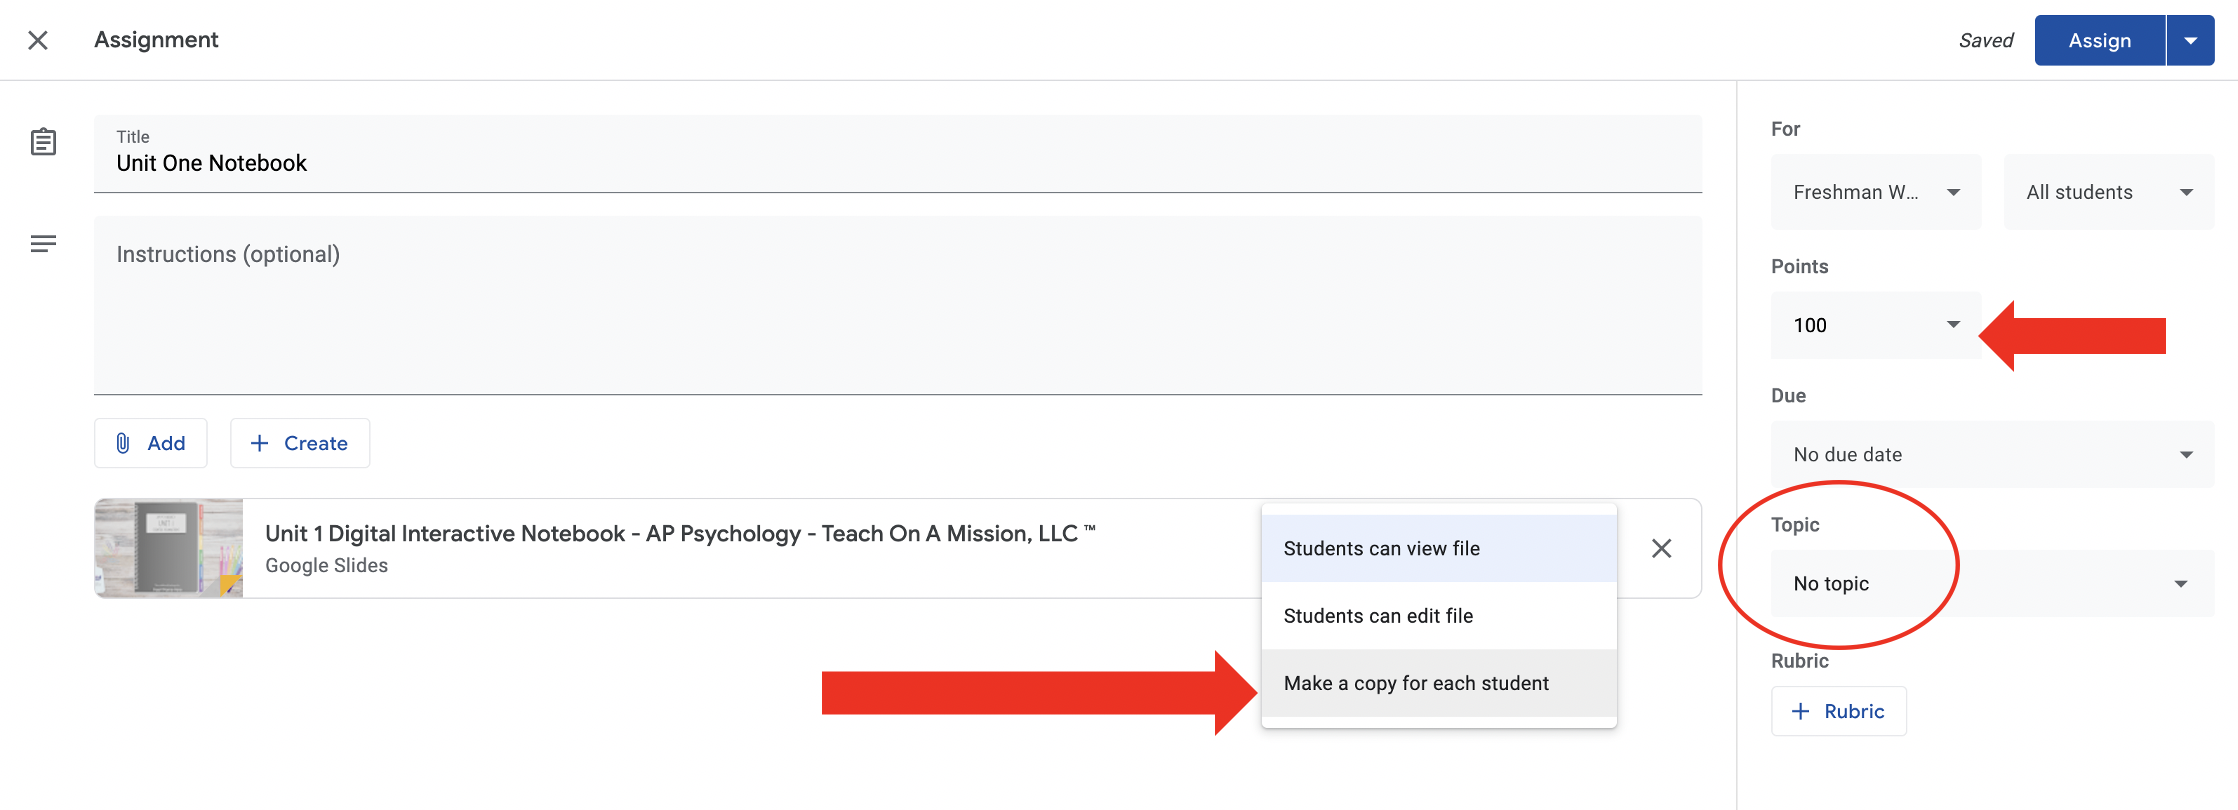
Inside of Google Classroom (or any LMS you may be using) be sure to make a copy per student so they each have their own, and select which Topic you would like it to live under if you’re going to make one notebook file per unit which I suggest so that the files don’t get too big and slow for kids. Depending on how you’ll monitor the work happening in these notebooks, be sure to select the number of points it will be worth as well before clicking Assign.
I’d like to offer some tips to help in the management of these digital notebooks, so that it can be a process you get started with right away, and don’t have to spend hours considering how you’ll make it work.
Bookmark It
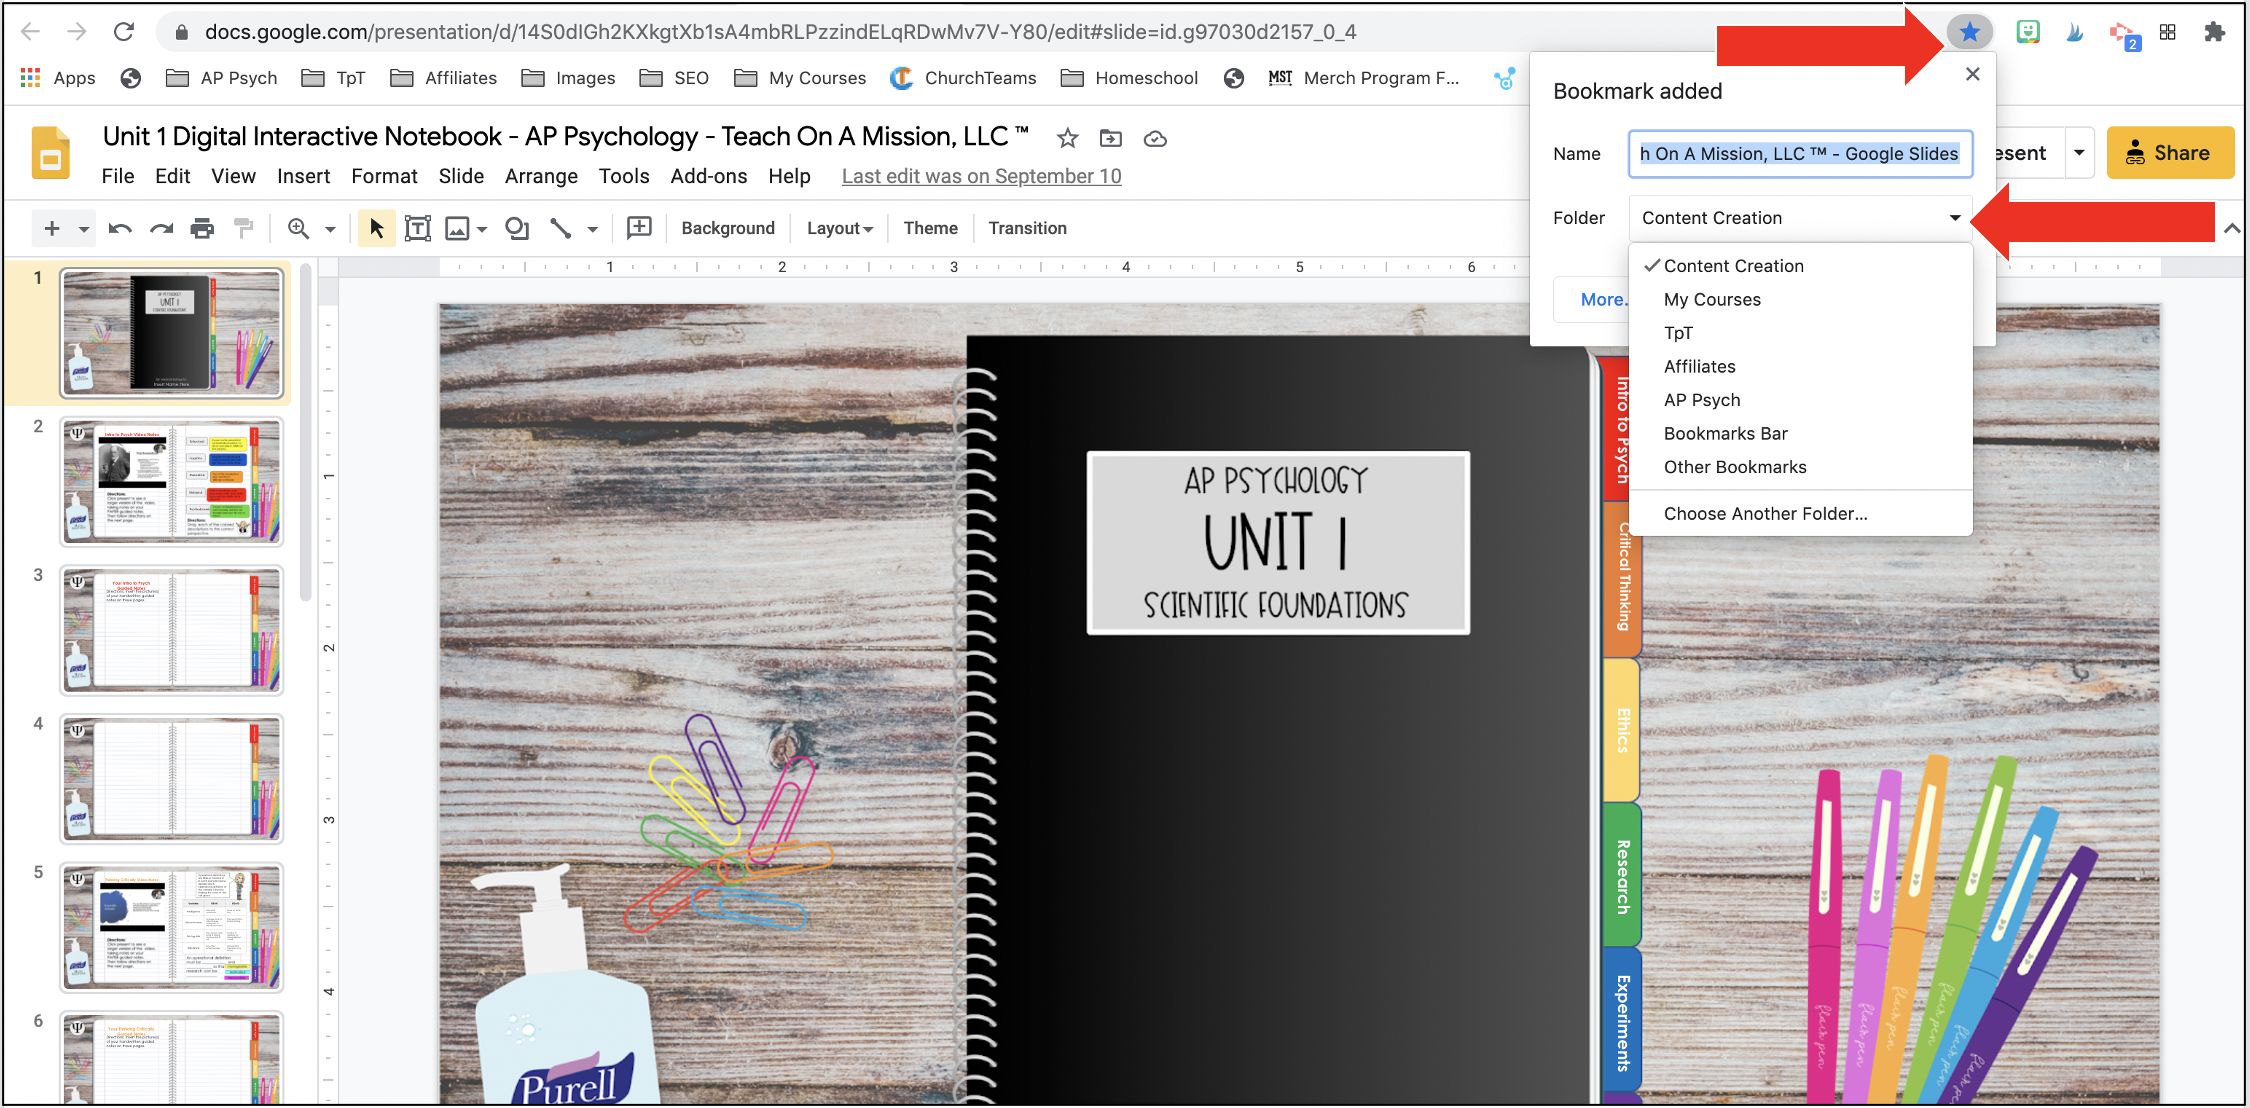
Another tip I have is to have students access the notebook for the first time at the beginning of the unit and then bookmark it on their device. This way they know they are in the correct file whenever they access it and they don’t necessarily have to navigate through Google Classroom or TEAMS (although that’s not really hard) to find it.

I show you on our website how to make a bookmark, but it really is super simple. Navigate to the DINB, the click the star to the very right of the URL bar (if you’re in Google Chrome). Be sure students not only name it appropriately (meaning, an obvious name), but also establish a bookmark folder for your class (they could create a folder for each of their classes) which they do by clicking the drop down arrow, selecting Choose Another Folder, and then New Folder.
Separate Notebooks by Unit
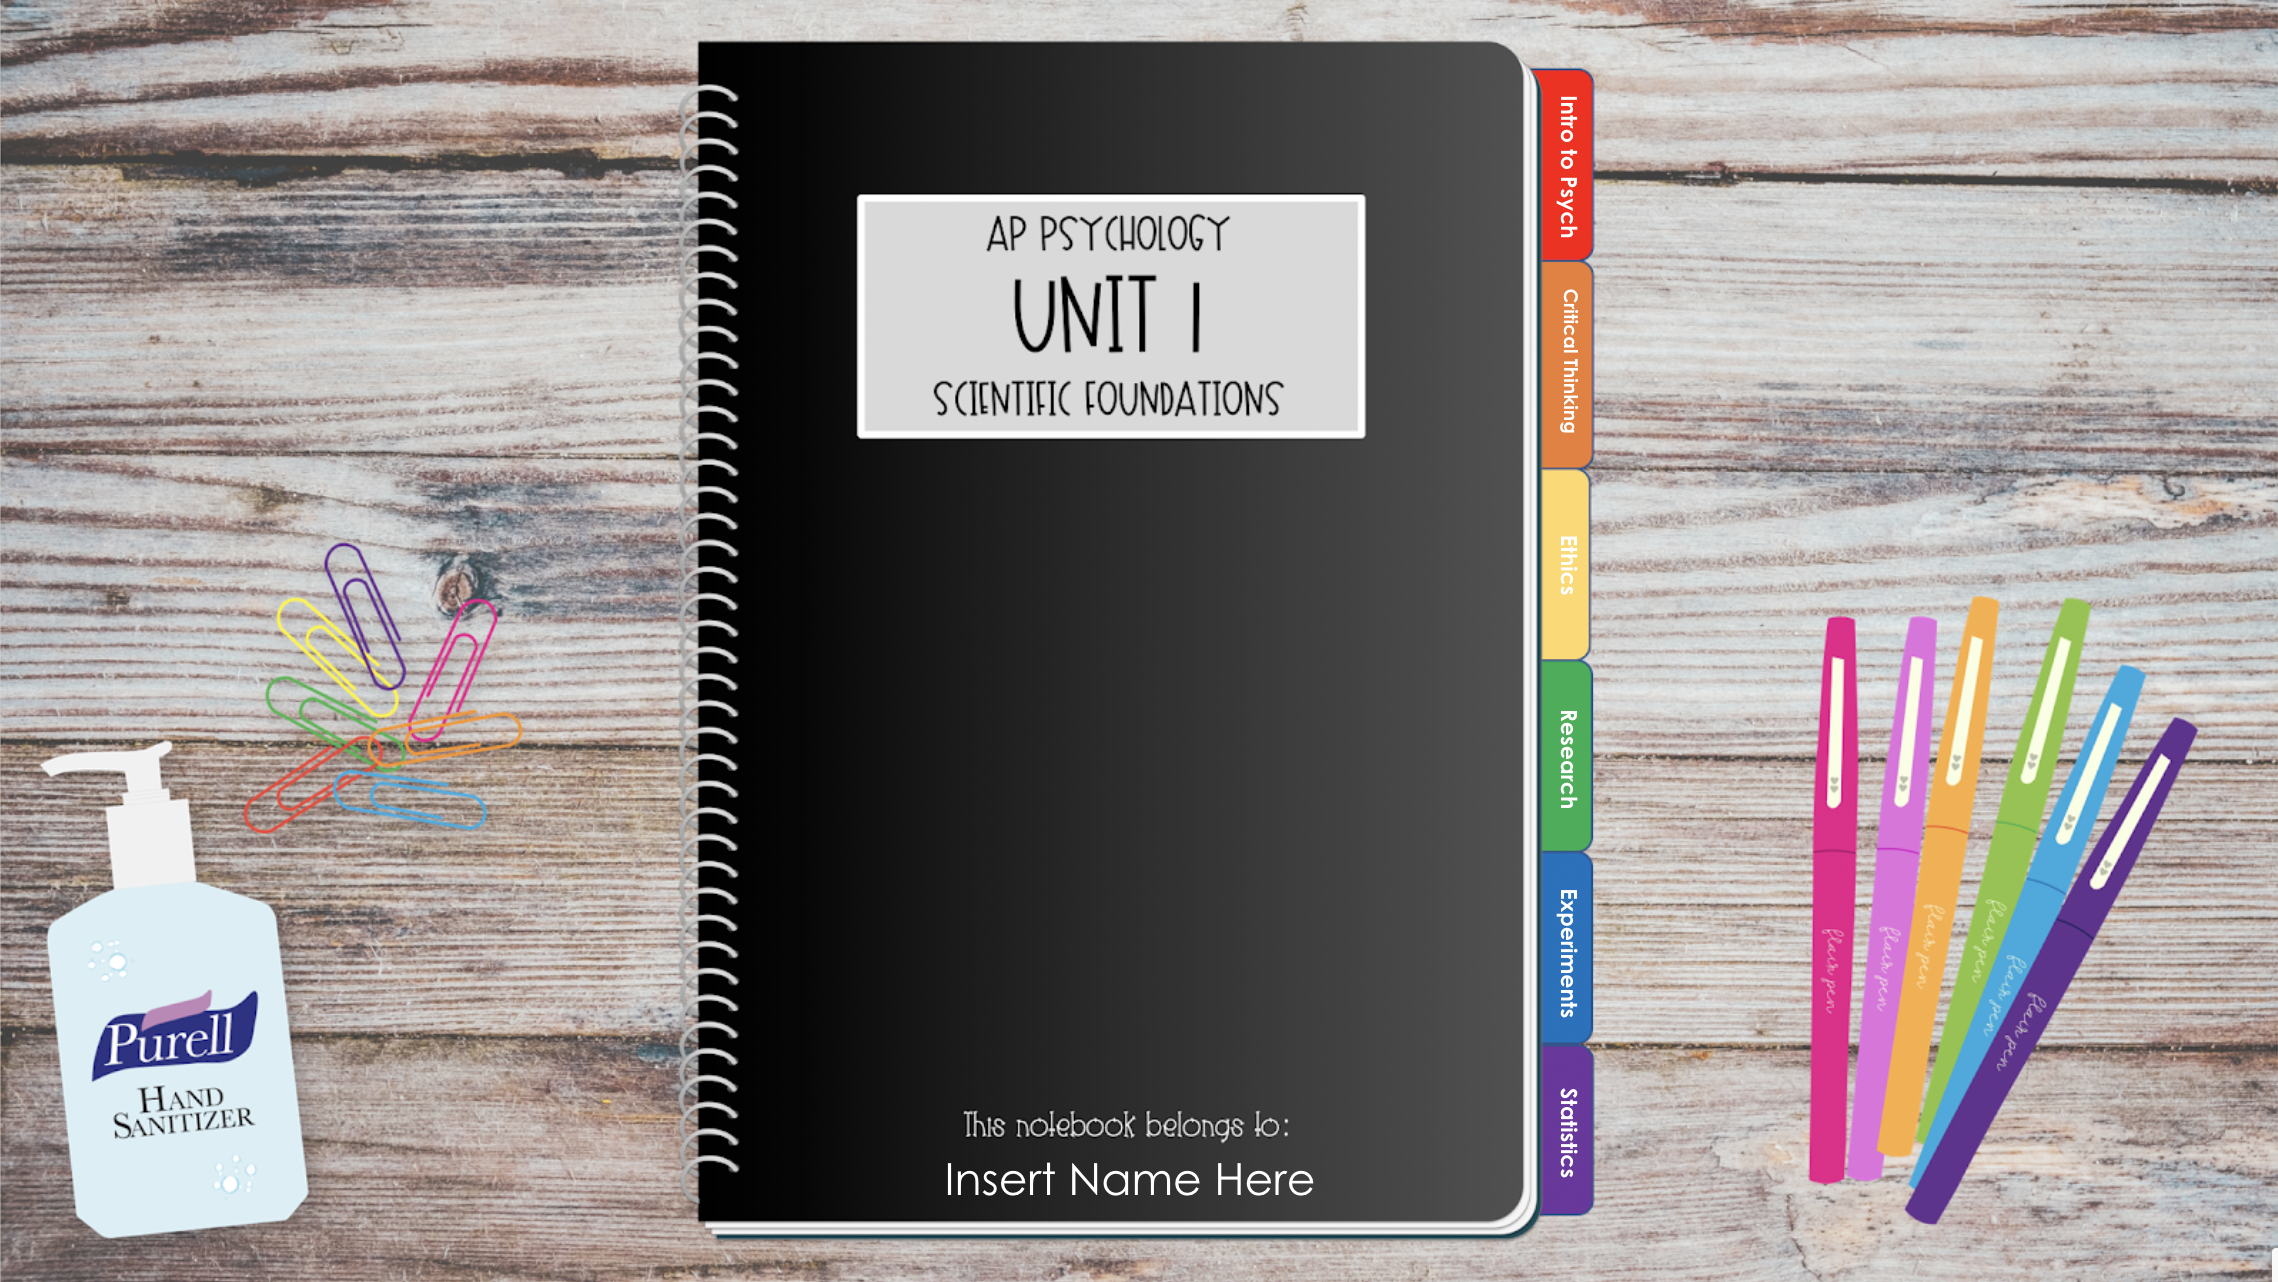
Next I’ll suggest that you create a separate interactive notebook file for each unit that you’ll assign in Google Classroom or TEAMS (or any of the other learning management systems). I’ve stated this tip already, but what I’d like to add is that you don’t need to reinvent the wheel every unit. Just make a copy of the Unit 1 notebook and rename it - that’s it. Viola! You now have your next unit’s notebook and can assign it, making a copy for each student.
Also keep in mind that you’re trying to make this one spot as much as possible. So on one page of the notebook you can house the materials they’ll be using for the activity, maybe a video, a website, an article, etc. Then on the corresponding page is where they complete the activity. Again, the idea is that it’s one spot. One tab. One place where they are working from to work through the content.
They’ll eventually get so used to the structure and its simplicity will allow them to focus on the content rather than all the places.
Keep Grading Simple
And authentic.
When you go to grade or check the assignments held inside the notebooks, it’s super easy to click through them, but have it split screened with your Google Spreadsheet or gradebook, for instance, so you can just put the “grades” in once. When I checked these notebooks, I did so every day or every other day while my students were in class, but the points accumulated - I didn’t enter them everyday. So I would keep a tally on a spreadsheet and then enter the total at the end of the unit. In my programs I give teachers the templates to do all of this.
The grade you assign to this system, no matter if it’s the binder, notebook, or digital notebook is, of course, entirely up to you. But I will say that the notebook's purpose supersedes grades - it’s more than grades. It’s about the learning process, and getting your students' learning process streamlined and straight forward for them, so that they can more readily prove their mastery… which is what comprises their grade… their mastery, not their work in learning.
Focus more on the conversations with individual students and how informative the notebooks can be rather than on the grade tied to it.
Don’t spend hours on it
No matter how you use a digital interactive notebook, the point is that it can in fact serve as one place for your students to both learn and show their learning without the overwhelm of having to do so with hella tabs open.
Likewise, there’s no point in using these in order for a bit more sanity if you’re having to spend hours creating and perfecting them before you even assign them to students. It’s just not worth it. But the benefit of using the notebooks is still there, so I’d like to offer you a template you can take, for free, as well as a video tutorial on how to do some quick edits in order to make it work for your courses.
The Digital Interactive Notebook template pictured on our website is available inside of our Virtual Teacher Toolkit which you can grab by filling out your name and email in the description of today’s episode (scroll down). I need your email address in order to send you the template, and then I’ll just be emailing you to let you know when our next episode full of tips and encouragement comes out - no spamming your inbox, I promise.
I also want to offer you this template, taking the creation of the notebook off of your to-do list so that you can focus on what’s more important about the notebook… what’s inside it for your students’ learning experience.
On our website and where you find the full length show notes for today, I show you my DINB and how I’ve used it with my students.
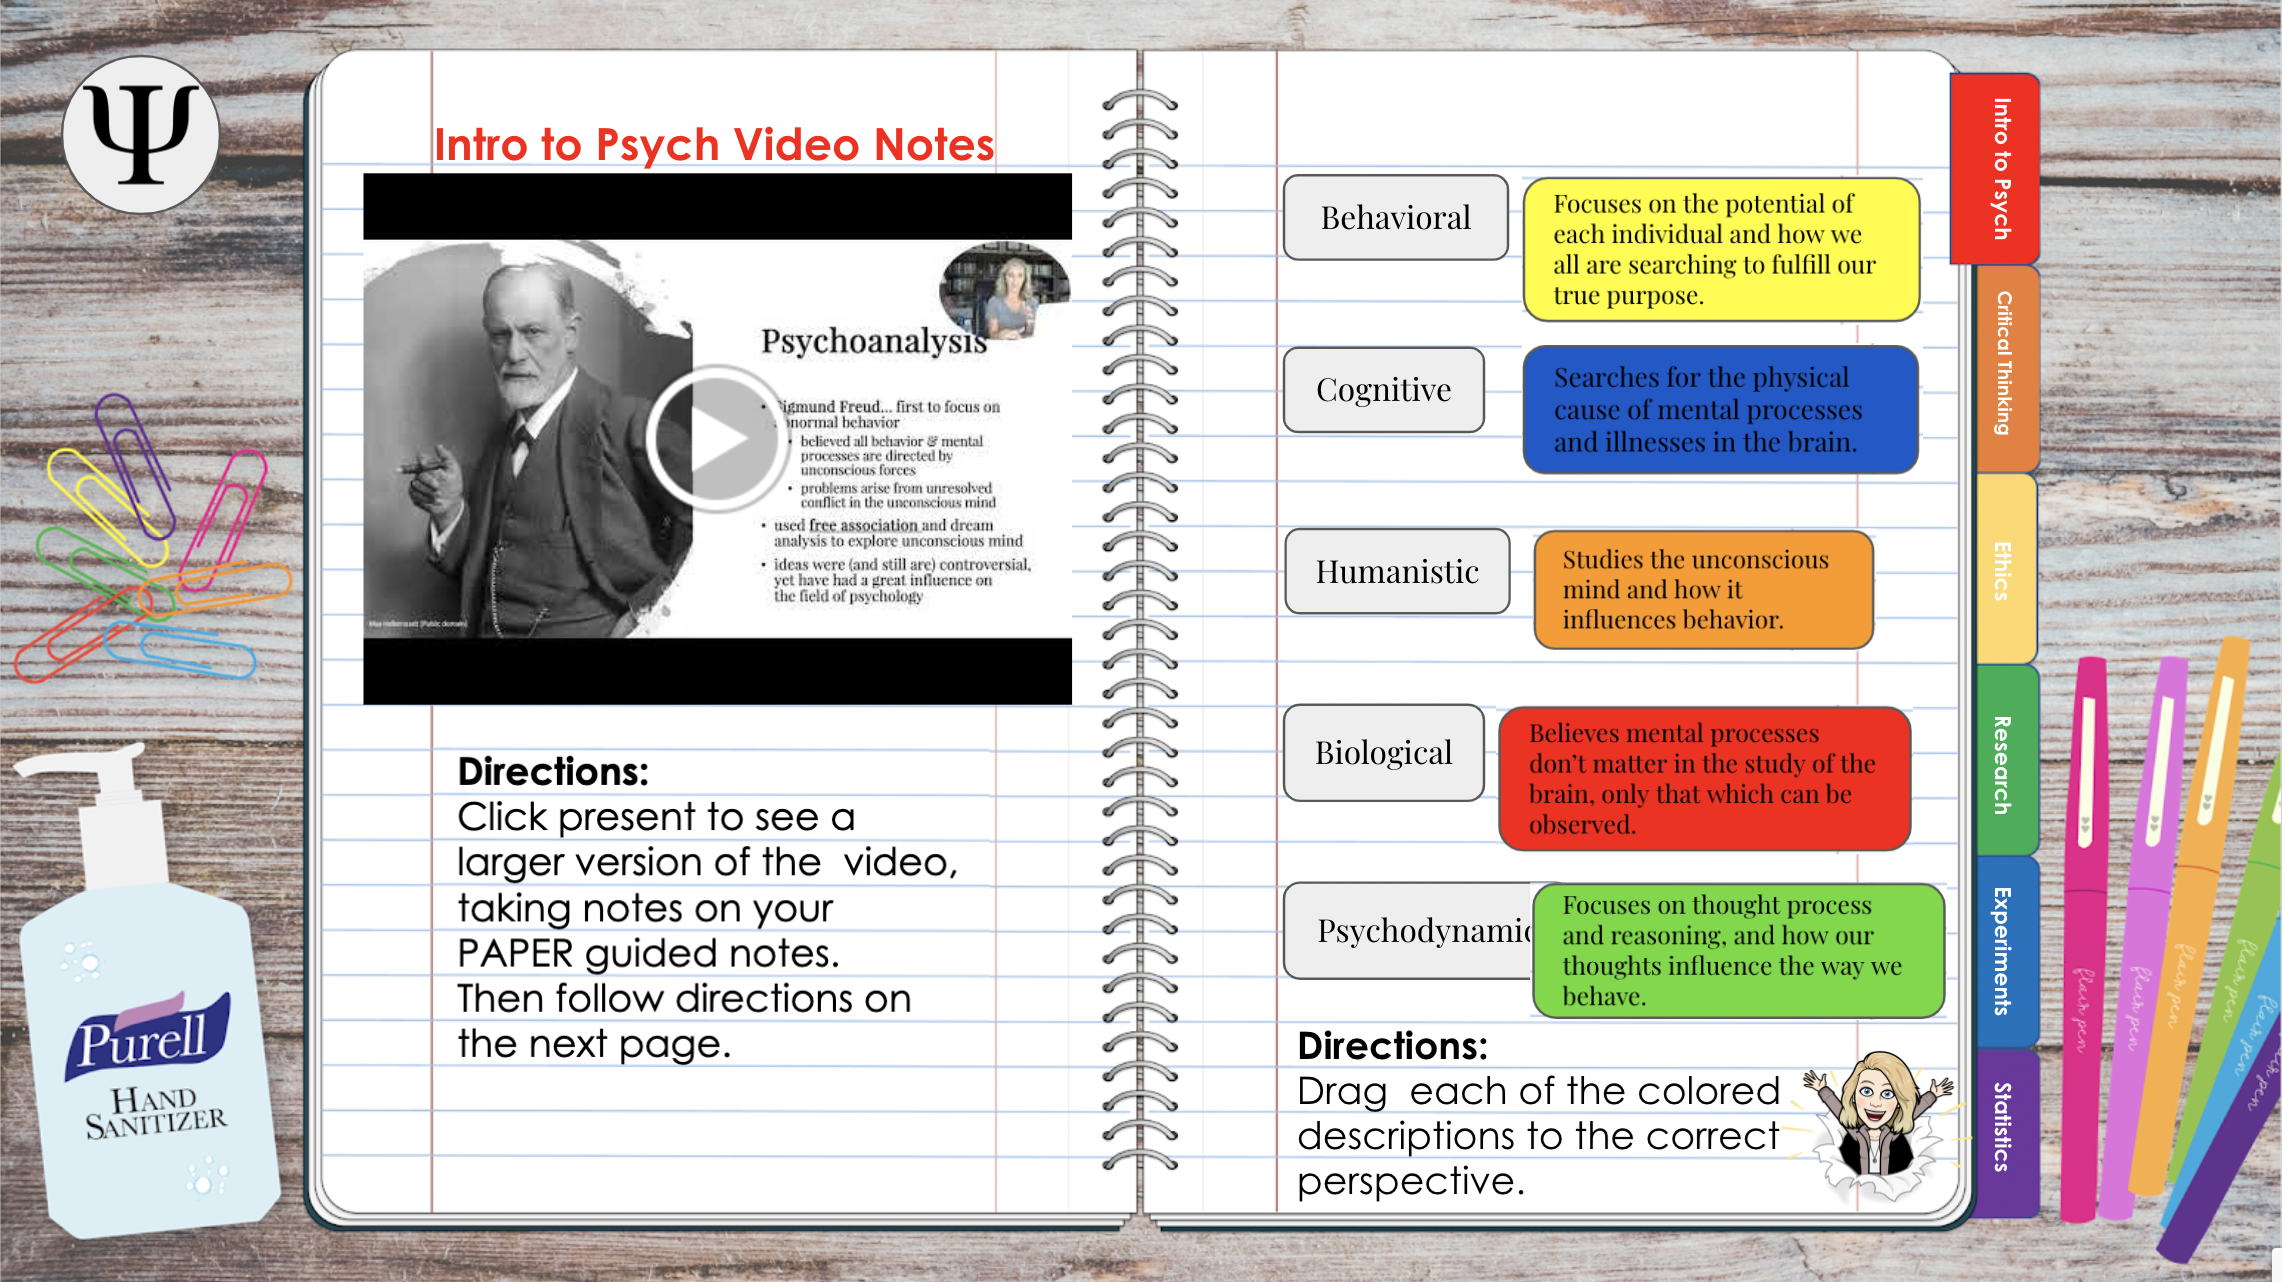
In my flipped classroom, I want my students to have one place where they reference the videos they need to watch, but also where they can do a quick interactive activity like the one shown above. I would encourage you to put this thought into your DINB as well. What’s the purpose and what will it streamline for your students?
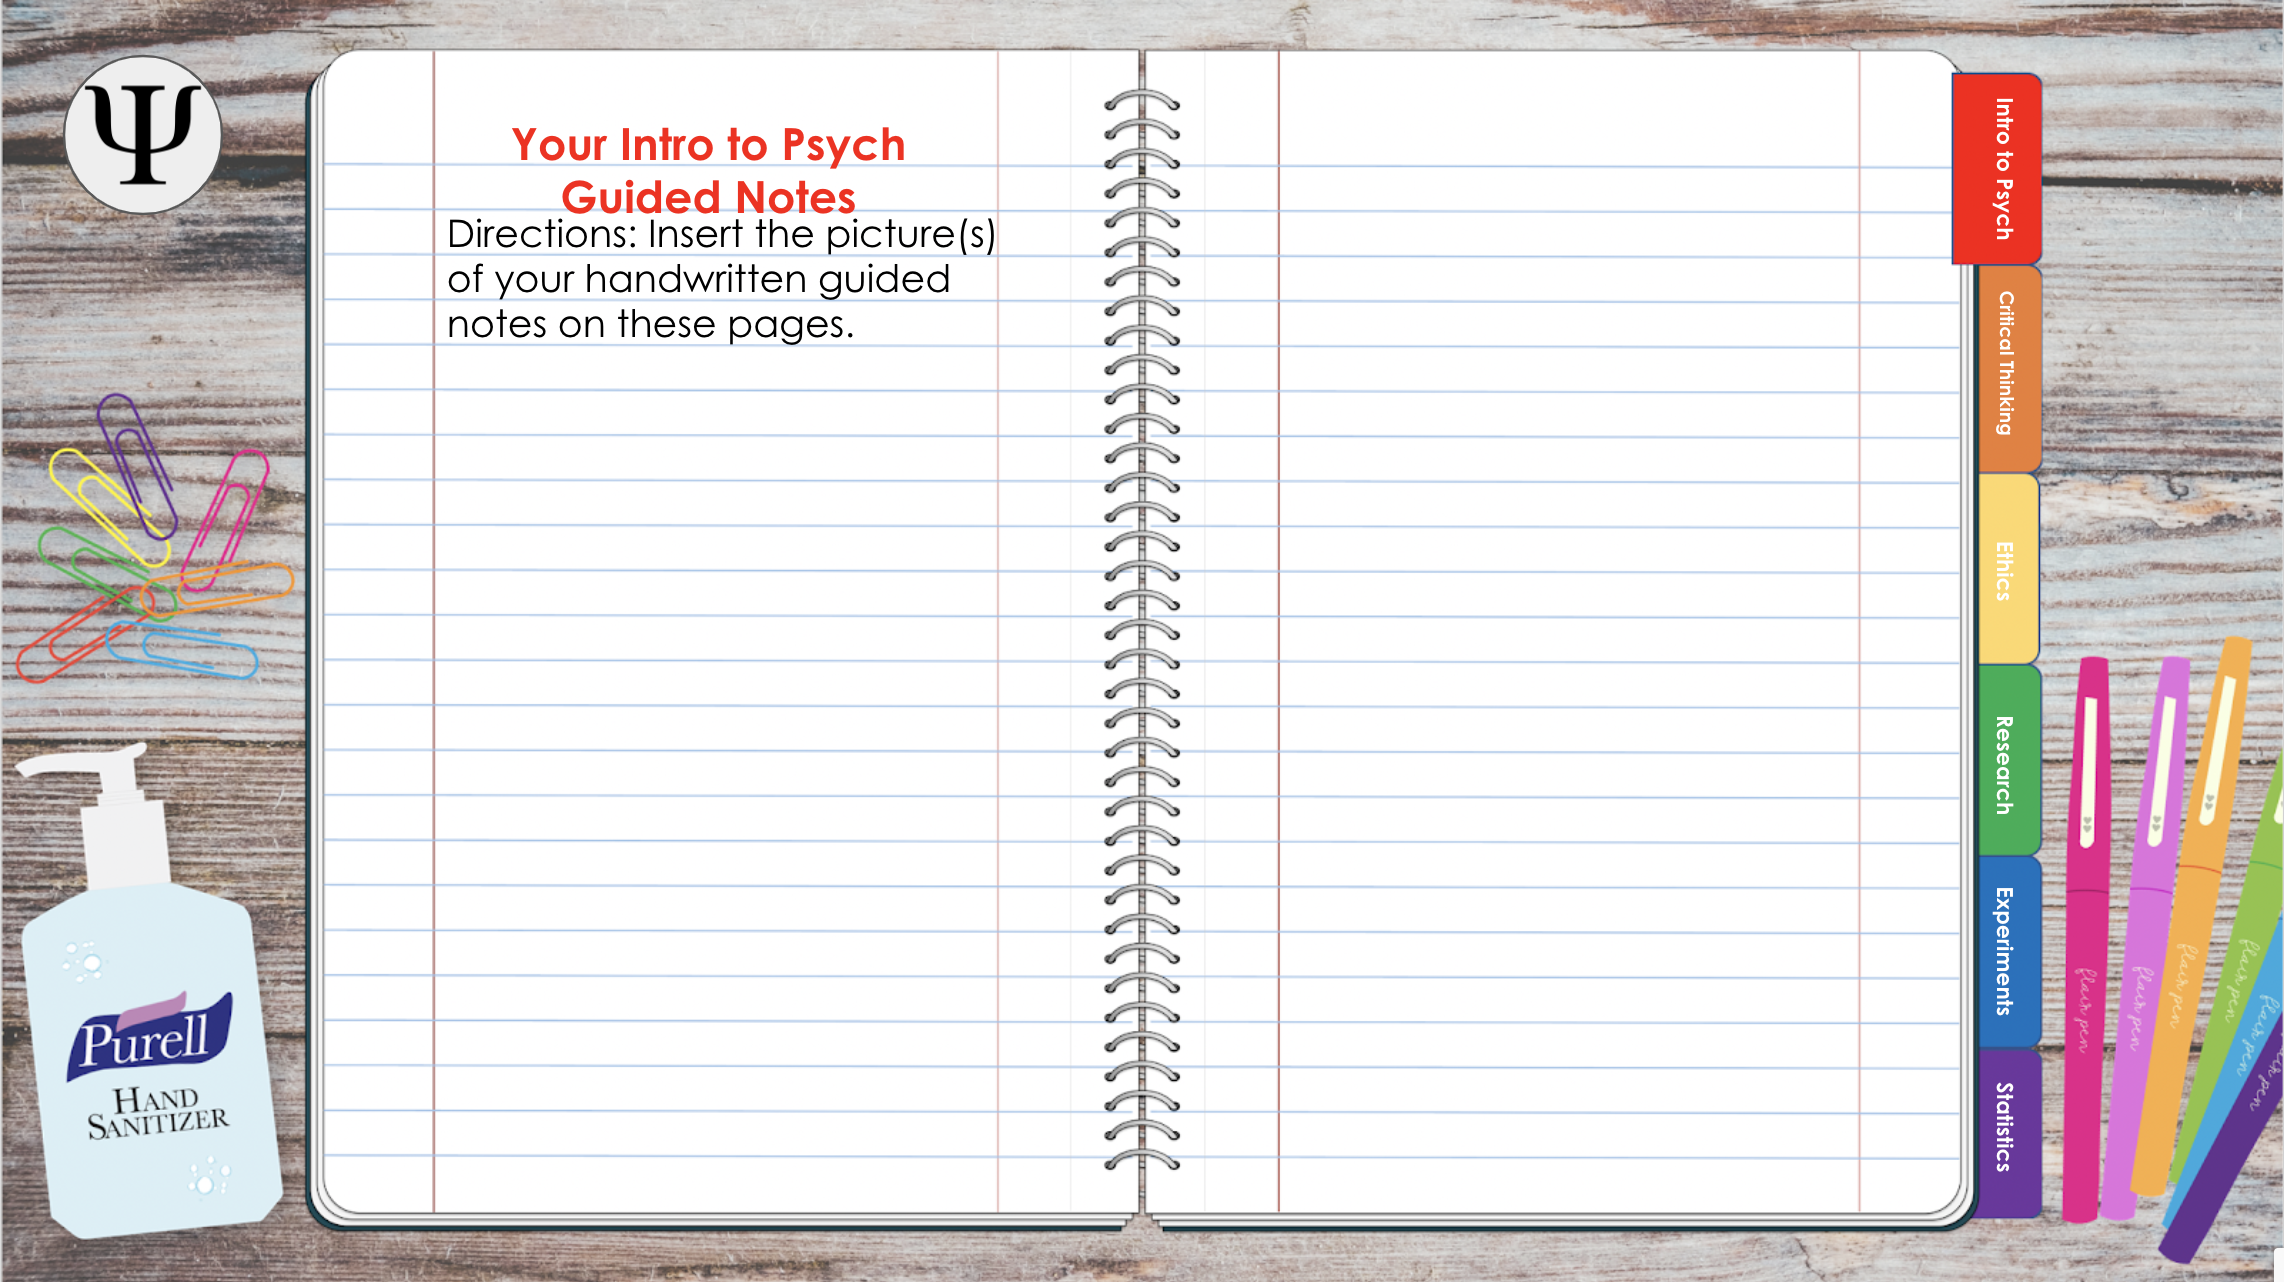
The next page then is where I’d have students insert a picture of their handwritten notes. Is this absolutely necessary? No, because they’ll keep their notes, but it’s a way for my students to show me their notes if our class or any individual student is in a virtual setting. The pages to follow then were where I put assignments like a drag and drop activity, fill in the blank or matching, that I just adapted to work in a Google Slides or Powerpoint file.
Last tip before we go. You DON’T want your students turning in this assignment until the end of the unit. You’ll want to have your eyes on their notebooks throughout the unit, but if they turn it in, they lose access to edit it (at least in Google Classroom they do), so be sure to set up that process - don’t turn it in until test day.
Get the Digital Notebook template here...
I sure do hope this post has been helpful in a practical way. Not just to let you know that digital interactive notebooks can serve your classroom in sustainable ways, but that you can now hit the ground running with one because you’ve got a template ready and waiting.
Alright, teacher-friend, there you have it. Binders, Notebooks, and Digital Notebooks, Oh MY! I hope this episode has encouraged you to streamline the student learning process by creating just one place where they create and encode the content of your class, and that you feel ready to serve your students in this way because it’s more sustainable for them and for you, and that’s what we’re all about here on the Sustainable Teacher.
Now, if this episode has been a convicting one for you and you’re ready to streamline your content delivery and student learning process so that’s more effective for your students and more sustainable for you, then I want to invite you to our free teacher-masterclass, 3 Insights to Flipping Your Classroom: What you Need to Know to Make the Most of Class Time.
It's a one hour masterclass packed with insights based on my ten years of flipping my own classroom and now helping over 500 teachers around the world do the same. At the end, you’ll receive a certificate of completion to get CEUs, and we’ll talk about how we can work together, with my expert guidance, to get your classroom flipped and class time looking exactly how you want it to look… more effective for students, and more sustainable for you.

Be sure to scroll down where you’re listening and get registered today as there are a limited number of spots available. I’ll see you there.
And I’ll see you here, same time, next week. Bye for now.

Author

Mandy Rice
Author
Hey! I'm Mandy. I've been teaching for 10 years and flipping for about the same. I hope you find just what you need here in my little edupreneur website and blog your all your flipped classroom needs.
Recent Posts
You want to flip your classroom but don't know where to start?
Get Mandy's Ultimate Flipped Classroom Starter Kit!

